Welcome to the Editing Den! My Editing Workflow
Today, I’m going on a tour of my editing den, and the process I go through to take footage of stuff and turn it into a final video for you all. So come along on this behind the scenes adventure!
Video⌗
Ingest⌗
The first step in my editing workflow is ingest. I have footage from a variety of devices and SD cards, and I need to get it onto a reliable storage as quickly as possible.
With the equipment I have, I really have four types of files.
- Footage from my Nikon camera is in h.264 format on SD cards
- Audio from the DJI Mic is in uncompressed wav internal to the device
- Footage from my iPhone is on the iPhone and needs to be copied over the network
- Screen capture of tutorials is captured in h.264 using OBS, on my local SSD
For the camera and mic, ingesting the footage means plugging the card into my desktop and copying the files. Since the MOV and WAV files are both compatible with Resolve directly, I copy these files straight into the working folder on my NAS for this video.
For the iPhone, it’s recorded in h.265, which isn’t compatible with the free version of Davinci Resolve. I haven’t bought a license yet since I want to try out the Linux version first before locking a license down to a single computer. So, using the native Files app, I copy the files into a big ‘iphone’ folder, where I can transcode them. I use Handbrake to transcode them down to h.264, and the resulting files go into the video’s working folder.
At this point, all of my footage is relatively safe on my NAS, stored on a ZFS mirror. I still keep the original footage on the card for now, until the nightly backup runs and I’m sure the footage is definitely safe. If I were to have a drive failure or NAS failure before the nightly backup runs, I’d still have the originals on the SD card.
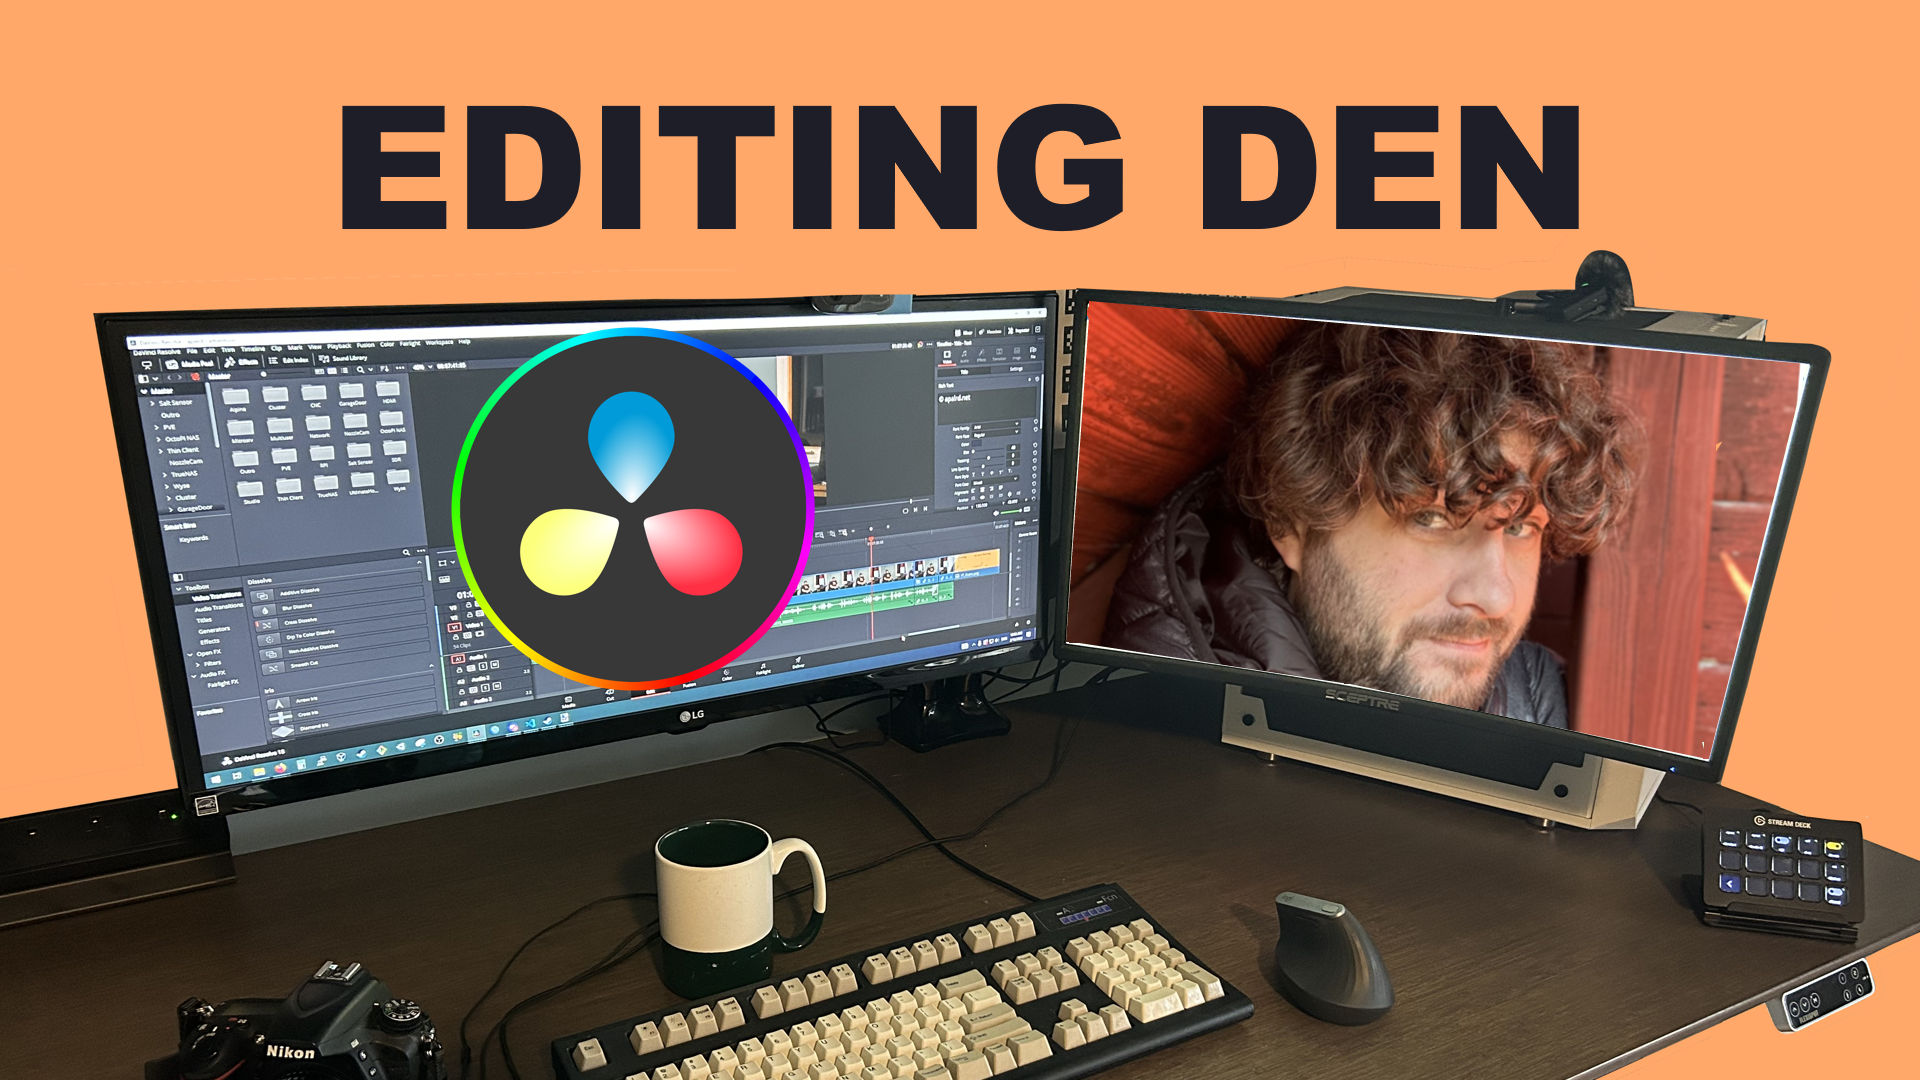
Workstatio and Peripherals⌗
As for the workstaion itself, my editing beast is a first-gen AMD Ryzen Threadripper 1950x, and it’s great at rendering and transcoding as well as virtualization. I like to use an ultrawide as my main monitor, so I have a 29" 21:9 monitor paired with a 24" 16:9 side monitor. It’s plenty of real estate for a video timeline or immersive game.
While I’ll usually write scripts on my laptop, which can sit on the corner of the desk, I have a very clicky typing keyboard made by Unicomp, paired with an ergonomic vertical mouse by Logitech.
The whole environment is tucked neatly into a closet, with LED lighting that I’ve installed for both atmosphere and recording. These are controlled by a QuinLED board via Home Assistant, and can be controlled from the Stream Deck.
Screen Capture⌗
Since most of my videos are software tutorials, they tend to include a lot of screen capture segments. For these, I film at my desk, and the workflow is a bit different from the other video segments.
Screen capture is done in OBS, the open broadcaster software.
During sessions, I rely heavily on my Stream Deck to control OBS. I usually use my side monitor with display scaling set to 150% to better accomodate viewers at lower resolutions or on smaller screens. Overlaying my face is done live in OBS, and I can turn it on and off with my Stream Deck. I use Edge as my web browser in all of my tutorials, and I reset it to defaults before each video.
After a recording session, program output gets copied to the working folder on the NAS as usual.
Editing Workflow⌗
At this point, all of my footage is in the working folder on the NAS. I import it into Davinci Resolve directly, so I’m editing directly over the network and not copying anything back and forth.
Since I have 5 gigabit Ethernet between my workstation and my switch, and 10 gig from there to the NAS, and I edit at 1080p with 1080p footage, I haven’t found a need to transcode to a mezzanine codec such as ProRes or generate proxies. In general the ZFS ARC hit rate on my NAS is extremely high during editing sessions so the speed of the spinning drives isn’t a bottleneck. I’ll probably re-evaluate all of these choices if I upgrade to equipment that can do 4K, but for the types of content I produce that isn’t necessary right now.
While I usually don’t generate proxies, timelapse segments in particular do stutter in the preview window. Resolve makes it pretty easy to right-click on a clip and generate optimized media as needed, which is basically a proxy. This takes quite a bit of space, with the timelapse clips for this project taking over 12 gigs at half resolution! But it does make it way nicer to scrub through clips with speed changes. So maybe I’ll reconsider my decision not to render proxies after all.
I use a single project in Resolve for all of my videos, with bins for different categories and videos. I haven’t really seen any suggestion on one project vs multiple and I find it easier to be able to grab clips and bits from other videos. Experts will probably disagree on this choice, and I’d love it if you did to boost engagement.
When I have all of the footage imported, I start by combining multiple files of the same shot into multicam clips. Most of my clips are actually multicam clips, since I add the audio track from the mics as another camera angle, but sometimes I also have as many as 3 real cameras. Resolve makes it easy to sync by audio automatically, and like magic I have a multicam clip and can independently select the video and audio angle shot by shot.
Once all of the multicams are syncd, I categorize clips into A-roll, B-roll, and screencap and may rename clips in the editor based on what makes sense. This is all purely in Resolve, the original filenames are still kept on disk.
Finally, I can start dropping stuff on the timeline. Usually I work from start to finish in a single editing session, although sometimes I take a break if I feel like I need to shoot a follow-up or more content. I have a few videos that have been sitting half-finished for months now, so you’ll see those eventually.
Rendering⌗
After editing is done, it’s time to render out the project. I use the YouTube preset and tweaked it a little. Youtube is going to end up transcoding from this down to all of the resolutions they support, so I’d like to use the highest reasonable bitrate to reduce the quality loss through that process. I save the file as an mp4 and click the button. Then, as the CPU goes to town and has fun, I wait for it to finish so I can upload it to Youtube. I name the final files with a major number and minor letter and keep all finished renders, even if they aren’t the final upload. For major changes, I’ll create a duplicate timeline for V2 and beyond.