WLED Lighting for my Desk
Today I finished working on new lighting for my closet office.
Last year I renovated my bedroom, to fit my computer desk better. I don’t need a massive closet and traditional American McMansions require a large closet space with plenty of wasted space in every single bedroom, so I decided to take the closet doors off to expand my bedroom and put my desk into the closet. After some network and power wiring work, I had a pretty comfortable expansion of my desk space and cleared the center of my room for VR gaming.
The Story⌗
That was last year. The downside I’ve found is that the closet doesn’t have a light. Sometimes this isn’t a problem, but if I want to use my desk for things other than computer work, I really need better lighting. So, I decided to use individually addressable RGBW LED tape. RGBW tape is similar to RGB tape, but with an extra white channel with a more broad spectrum light, to improve the CRI of the white light. An expert on this topic is Quindor of QuinLED. So, I followed his site and watched some of his videos to decide exactly what I want.
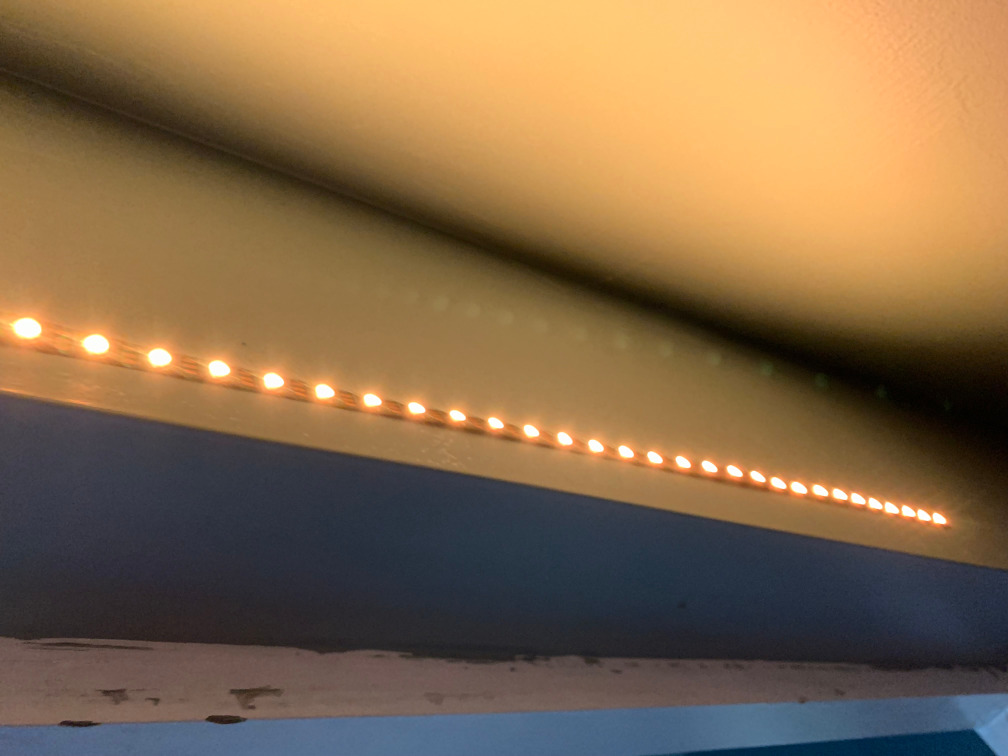
Since my closet door opening isn’t that big, I only need 1.5m of tape. Since I’m running a short tape, I don’t need higher voltages, and the voltage drop across a 5V tape this short with the AC power supply a few feet away is reasonable, so I went with a 5V LED for simplicity (and I had some fairly beefy 5V AC adapters already). The LED tape came with a connector, and I soldered that to 5’ of wire to mount the QuinLED down near the ground. I got the IP30 LEDs since they dissipate heat better with no enclosure or potting, and are easier to work with. I used the built-in tape to secure 1.5m of the strip to the back of the closet door, so it faces the angled ceiling of the closet to bounce light at my desk. I taped the wire to the wall around the back of the closet, and bundled it with wires I was already running up the closet wall (Ethernet and HDMI to my TV). I connected the QuinLED (wired Ethernet model), and a 5V 10A power supply I already had. It’s a bit overkill, with the full RGB white + dedicated white at full brightness, the strip is estimated to draw around 4.9A.
I found the WLED on the network by looking at DHCP leases in my router, connected to it, and set it up for my strip. I’m using 1.5m of 60 LED/m strip, which is 90 LEDs. They are RGBW (with a natural white channel), using SK6812 family of LEDs. I ran through all of the colors to make sure the configuration was correct, and was amazed at how easy to use the WLED software is. Home Assistant found the WLED through Discovery, and I added it and configured it to be part of my bedroom. It exposes most of the WLED functionality through the HA integration, which is excellent.
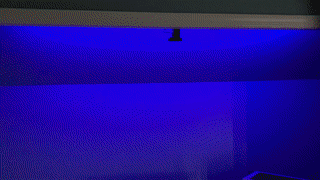
Results⌗
Click on this image for an animation:
Project Files and Parts List⌗
I didn’t create any of the software for this project. Here are links to the hardware and software developers who made this possible.
- LED Tape - I bought SK6812, RGBNW (Natural White), 5m, 60 LED/m, IP30 - AliExpress Affiliate Link
- QuinLED DigUno - I bought it from DrZZs with the Ethernet add-on board - Quindor’s Site or DrZZs Site
- WLED Firmware - pre-installed if you buy the QuinLED above - Github Some links to products may be affiliate links, which may earn a commission for me.