Simple Multi-Room Temperature Monitoring with Dallas One-Wire
This project is my entry into data collection at home. I learned a lot about what not to do, but I got a decent sensor network out of it, which continues to be (mostly) reliable to this day.
Dallas One-Wire Sensors⌗
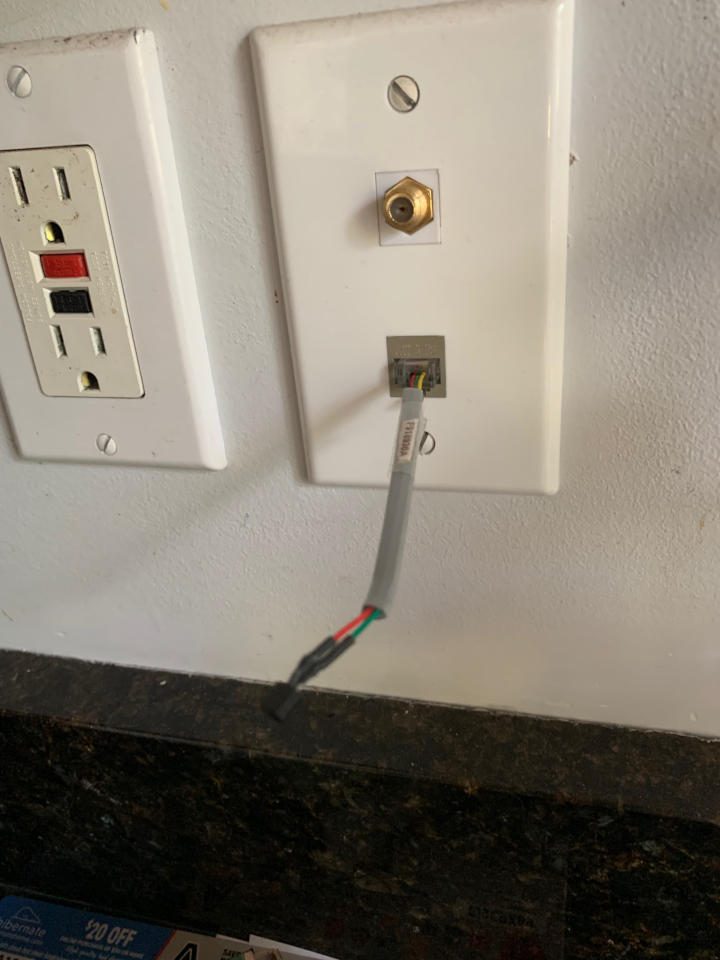
See the Wikipedia Article on the subject for a brief overview. I started this project with the goal of proving that my bedroom (located on the southeast corner of the house) was notably colder in the winter than other rooms. The Dallas DS18S20 one-wire sensors are super cheap (~$2 each from Digikey), the USB master isn’t crazy expensive, and they can deal with a star topology bus at decently short lengths using the Cat5 wire already in the walls. I just had to wire it all up.
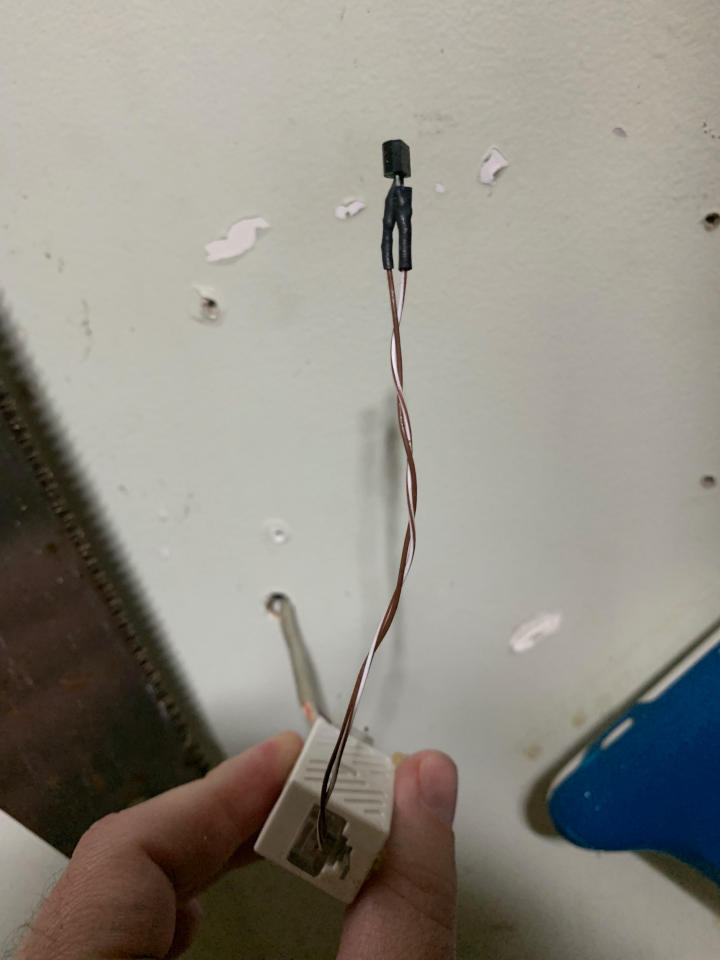
To wire the sensors to the existing RJ45 jacks, I bought a huge spool of low cost 4 conductor phone wire (flat, not twisted pair) and RJ11 phone jacks. Only the center pins (normally used for a single telephone line) are used in parasite power mode, with one pin for ground and one pin for power+data. I crimped the RJ11 to a 6" piece of phone wire and soldered the other end to the TO-92 sensor, heat shrinking the connectors. I plugged each one in to my LinkUSB connected to my Mac and listed the bus contents, labeling the sensor with the unique portion of its ID.
After making a few of these, I found the cheap stranded phone wire too difficult to strip and solder. It was fine to crimp to the RJ11’s, but soldering it was not fun. For the future, I pulled a single pair out of a Cat5e bundle (which contains 4 pairs), crimped the pair to the center pins of an RJ11, and soldered them to the TO-92 sensor. I didn’t take the time to label these, I watched the whole network to see which device was new each time I plugged one in.
One Wire Bus Mastering⌗
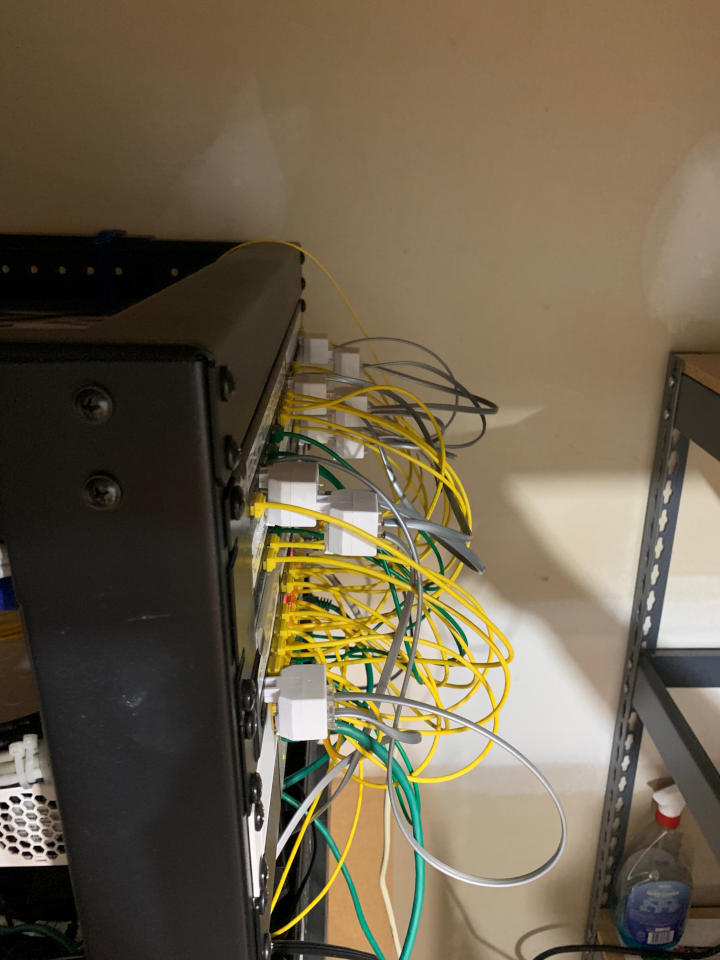
To master the one-wire bus, I chose the iButtonLink LinkUSB. I initially bought one, and used it with my Macbook to identify sensors using OWFS’s built in webserver mode. After getting the network setup, I moved it to my FreeNAS server. I created a jail in the FreeNAS server to host EmonCMS. I won’t go into detail on how to set this up, I’m not an expert on FreeNAS, FreeBSD, or jails. To publish data to EmonCMS from the one-wire bus, I installed owfs in the jail, passed the USB to serial adapter in the LinkUSB into the jail, and wrote a small program that launched as a daemon to read the bus using the one-wire C API and push the resulting data to EmonCMS via it’s HTTP endpoint. The code is available on Github. As all Cat5 runs in the house are home-run to the patch panel, I made short phone cords and used cheap phone splitters to make up the 1-wire master splitter in the basement.
The Project Files and Parts List⌗
Here are all of the files and parts required to replicate this project (Updated 2021/09 with MAXIM replacement)
Summer 2020 Update⌗
As of Summer 2020, the FreeNAS server was replaced with bare Linux (Ubuntu 18.04 Bionic), and the EmonCMS jail was replaced with an LXC container running Node-Red. The LinkUSB was moved to a nearby Raspberry Pi, which hosts an owserver which is polled by Node-Red periodically to push data to InfluxDB for visualization in Grafana (Project Here). The network has been expanded to include the garage and an outdoor sensor, and a second LinkUSB to split the network in half due to the wiring length and difficulty reading some sensors with so many splits.
Summer 2021 Update⌗
As of Summer 2021, the original automation sustem project is being slowly migrated to Home Assistant. The owserver is still in use and is being polled by both Node-Red and Home Assistant at this time. The outdoor sensor failed due to corrosion of the wires where the heat shrink meets the TO-92 package, in the future outdoor sensors should be hot glued or potted for better protection. No indoor sensors have failed yet.