Camera Bracket for the CR-10 MAX
As I recently posted about, I got my CR-10 MAX working and did some basic upgrades to it. After that, it was printing pretty well, so I decided it needed a camera so I could start trusting it with longer unattended prints. I still don’t have power control of the printer, so I won’t let it run when I’m not home, but now I feel comfortable leaving the basement knowing I can check to see if it’s making a mess of itself.
I used the same camera as my Prusa, because I had already bought a second one and it works well enough for what I’m doing. It’s PoE, and with two Raspberry Pi’s and two PoE cameras, I had to get a little Netgear 5 port PoE switch for my 3D printer table since there are only two jacks on the wall.
Mounting Bracket⌗
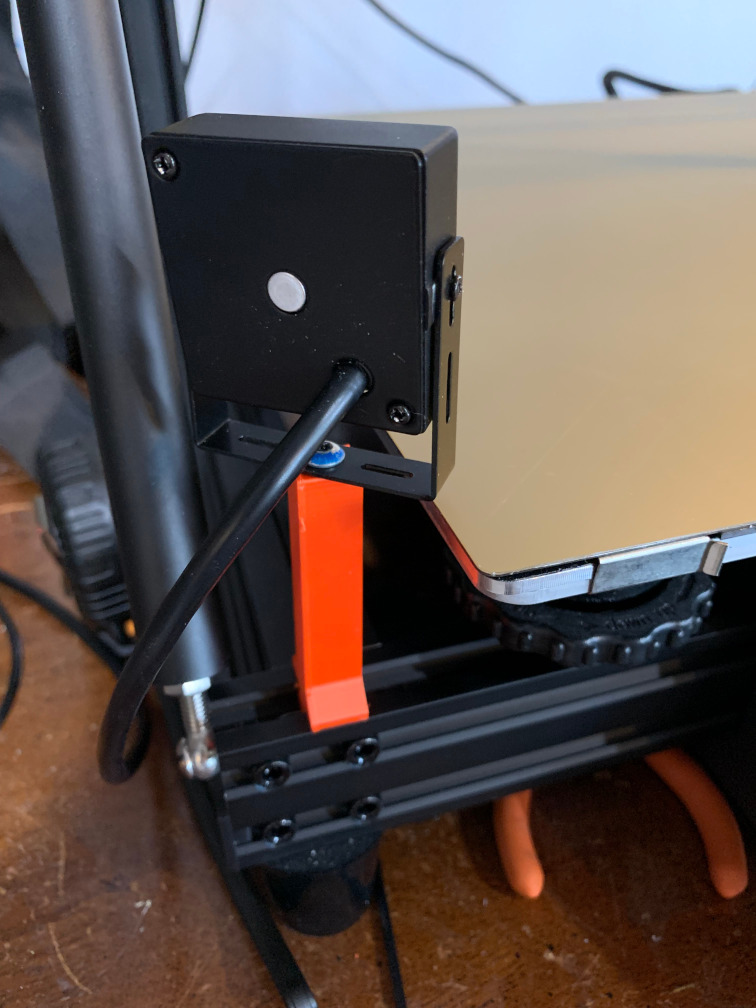
I’m not making an enclosure for the CR-10, so I need to mount the camera directly to the printer. Since the CR-10 is made of T-slot extrusion, I decided to make a part that fits into the slot snugly and mounts the camera. The CAD of this part is pretty simple. I found a dimensional drawing of the 2020 style extrusion used by the printer (so named for it’s 20mm x 20mm dimension), and replicated the features of the slot as closely as possible, then printed a test piece. As expected, it didn’t fit in the slot, so I reduced the dimensions down slightly until it was a very snug fit. The top of the bracket has a hole which is a bit larger than the tap size for a #8-32 UNF fastener, and I tighten the fastener through the camera bracket without using a nut (purely threading into the plastic). This works well enough for the little camera on the little bracket.
The Final Result⌗
The Project Files and Parts List⌗
Here are all of the files and parts required to replicate this small project. As usual, all design files are licensed Creative Commons CC-BY-SA unless otherwise noted.
- Printer Mount Bracket (AMF Format)
- Printer Mount Bracket (FreeCAD Original)
- JIENUO 5MP Mini Panoramic Camera POE (affiliate link) Some links to products may be affiliate links, which may earn a commission for me.