Diskless Windows Desktop using PXE with a Linux backend
Inspired by recent a recent video on the basics of PXE booting by ‘Tall Paul Tech’ (formerly known as CWNE88), as well as a comment by Linus of Linus Tech Tips that his new home server could ’network boot everything in his house’, I wondered how easy it would be to network boot everything in my house. In an ideal world, this would solve a lot of problems regarding managing backups of the drives - by simply not having drives at any client, they can all be managed and backed up centrally by the server. I’ve already come to love the flexiblity in separating storage from compute in a virtualization environment, where I can use a ZFS backend to deal with snapshots, replication, and file integrity checking, and I’ve upgraded the network speed for my workstation so I can work on files directly off the network using mapped network drives, but this still leaves my primary boot disk vulnerable, and while my files are safe, my installed programs are not. I could certainly recover from a boot disk failure without data loss, but it would take a while to get everything re-installed again. So, if I could keep the boot disk on the storage backend, it would gain the integrity protection and snapshots that the data has. Being that Linus will only be concerned with gaming, it’s probably important to be able to boot Windows, as unfortunate as that sounds going in to this project.
The Basic Design⌗
In short, we are going to rely on PXE to get the system off the ground, and then load iPXE (a better PXE) using the ‘chainloading’ method (where traditional PXE is used to load the improved open-source PXE), which we will then use to boot off an iSCSI target containing a Windows disk. If we had Linux clients, we could rely on NFS instead of iSCSI for the root filesystem, and we would curse a whole lot less.
So, there are a few components needed here
- The DHCP server, which at a minimum has to point to the PXE server (the ’next-server’ directive as well as the boot file directive).
- The TFTP server, which stores the files used by PXE to load iPXE
- The HTTP server, which stores additional files used by iPXE to load the operating system, although not required after the bootable iSCSI drive is configured. This could also be expanded to serve custom iPXE scripts to each client based on their MAC address or other unique identifiers.
- The Samba server, which stores the Windows installation media, not required after installation
- The iSCSI target, which stores the virtual block device used to store the Windows C drive
To implement this project, for testing, I’ve created an Ubuntu 20.04 VM on Minilab to act as the server for TFTP + HTTP + Samba + iSCSI, and I have an old amd64 machine which will act as the client. It physically has no hard drive installed. It’s an old Atom processor in an ITX embedded motherboard, but it should be enough to prove that this method works without buying any hardware.
Setting Up the DHCP server⌗
This one is pretty simple. I use OPNsense as my DHCP sever for my existing network, so I just had to go down to Network Booting, Enable Network Booting, and set next-server IP and boot file name. I set the DHCPv4 and DHCPv6 server to have a static reservation for the Ubuntu VM, so it will have a consistent IP without setting a static IP inside the VM, and set next-server to that IP. So, clients will now look to the Ubuntu server for their PXE boot files. I just need enough configuration in the DHCP server to get the dumb PXE clients to load iPXE which is compiled with an embedded script pointing it to the HTTP server, where it can go for the rest of its configuration.
What happens at this point? If I power on the test system with next-server set, and it tries, but there is no TFTP server for it to find. In this case, we want to boot iPXE, which is a better PXE environment than the default, and will hopefully let us boot from iSCSI.
Setting Up the TFTP server⌗
This one is also pretty simple. In my Ubuntu VM, I installed it from apt and that was that.
sudo apt-get install tftpd-hpa
By default it places the data at /srv/tftp, but the config file is located at /etc/default/tftpd-hpa if you’d like to change that. I’m fine with the default location.
I added a blank file called undionly.kpxe to the tftp folder and set that as the boot file name for BIOS in the DHCP settings (the name will become relevant later). I booted my test system (which is old enough to use legacy BIOS) and it attempted to load the file but couldn’t boot it, since it’s just a blank file.
Setting Up the iSCSI Target⌗
If you’re doing this for a ‘production’ environment, you should use something like TrueNAS and setup your iSCSI target there. I’m not an iSCSI expert by any means, but I got this to work. The whole point of this project is to try new things.
First we need to install the iscsi target on Ubuntu:
sudo apt-get install tgt
Then we need to setup an iSCSI target.
sudo nano /etc/tgt/conf.d/target01.conf
And the contents:
<target iqn.2021-09.net.apalrd:win10>
    backing-store /srv/disks/win10.img
</target>
And we need a blank image file:
fallocate -l 20G /srv/disks/win10.img
Restart the server
sudo systemctl restart tgt
Look at the status
sudo tgtadm --mode target --op show
So now we have an iSCSI target which we can use to store the Windows C drive, but nothing is installed on the disk image.
Setting up iPXE⌗
We would like to use iPXE to get the process rolling. So, cd to a place you can keep a git repo, and clone it:
git clone git://git.ipxe.org/ipxe.git
Follow the instructions here to make sure you have the dependencies installed so you can build
Then we need to create an embedded file so it will run a script when it boots:
cd ipxe/src
nano boot.ipxe
And the contents:
#!ipxe
#Setup networking
echo Setup Networking
dhcp
#Boot from SAN
echo Boot from SAN
sanboot iscsi:<IP>:::<LUN>:iqn.2021-09.net.apalrd:win10
Although all of the examples for ipxe show LUN as blank (iscsi::::iqn…), I found that I needed to set LUN to 1 with the default configuration of tgt. It seems like LUN 0 is always a Controller, with LUN 1 being the Disk. Not sure why exactly this is, but tgtadm shows the LUN numbers for each target correctly. Additionally, I had trouble with Windows giving me an ‘INACCESSIBLE BOOT DEVICE’ error, which I’ll get to in a bit.
Then we can build ipxe with our embedded script:
make bin/undionly.kpxe EMBED=boot.ipxe
Then finally we copy that into our tftp folder so clients can find it
cp ./bin/undionly.kpxe /src/tftp
Setting up Apache2⌗
Since TFTP is pretty ugly, I installed Apache2 to serve files over HTTP for the installation process. This isn’t used after install, but it could be used along with PHP / some scripts to send more complex commands to iPXE once it’s been loaded via TFTP. There are better guides than mine out there, so just setup a basic apache2 with the http root in /srv/html with full read access to anyone.
Setting up Samba⌗
Again, we need Samba for the install process so I installed it with no permissions and mounting a share ‘server’ at location /srv. This also lets me copy files to the http root, tftp root, and iscsi disks folder from my Windows workstation as needed.
sudo apt-get install samba
sudo nano /etc/samba/smb.conf
Add the following lines to the end:
[server]
  comment = Server directory
  path = /srv
  browseable = yes
  guest ok = yes
  read only = no
  create mask = 0777
acl allow execute always = True
Then restart Samba
sudo systemctl restart smbd nmbd
Installing Windows⌗
I first tried to install Windows in a VM, then copy that VM to the win10.img disk that’s being shared over iSCSI. It was not properly configured for iSCSI and gave me the ‘INACCESSABLE BOOT DEVICE’ error. So, I decided to install it over the network.
I chose to go with the ‘wimboot’ method, booting WinPE (windows preboot execution environment) according to this guide. I modified my boot.ipxe temporarily while installing, created the folder structure using copype, and moved it to my HTTPS directory. Since I was embedding the script instead of loading it from HTTP, I modified all of the paths to include http://<IP>/ in front of them. The resulting script is:
#!ipxe
#Start networking
echo Start Networking
dhcp
#Set web root
set webroot http://<IP>
echo Webroot is ${webroot}
#Set architecture
cpuid --ext 29 && set arch amd64 || set arch x86
echo ARCH is ${arch}
#Sanhook the Windows drive
echo Attaching iSCSI drive
sanhook iscsi:<IP>:::1:iqn.2012-09.net.apalrd:win10
#Load wimboot
echo Loading Wimboot
kernel ${webroot}/wimboot
initrd ${webroot}/${arch}/media/Boot/BCD        BCD
initrd ${webroot}/${arch}/media/Boot/boot.sdi   boot.sdi
initrd ${webroot}/${arch}/media/sources/boot.wim    boot.wim
boot
Of course, you need to make ipxe again and copy the new undionly.kpxe to the tftp root.
Now we need a Windows install to install from. Download the Microsoft media creation tool and use it to create an ISO image. I then unzipped the files on my Windows computer using 7-zip, dropping them in the ISO folder.
Now boot the client. It should boot into a Windows graphical command prompt. We now need to connect over Samba to the location of the Windows ISO and run the installer. Be warned, it’s a very slow process, don’t expect anything to happen instantly.
net use \\<ServerIP>\server
\\<ServerIP>\server\html\iso\sources\setup.exe
Since we told Samba earlier that executing anything is fine (who needs security when you’re prototyping), we can execute the installer. We now get a normal-ish Windows GUI installer, loaded over SMB, from the WinPE environment we network booted over HTTP, from the iPXE environment we loaded over PXE, with no physical storage or disks at all on the client. Not bad.
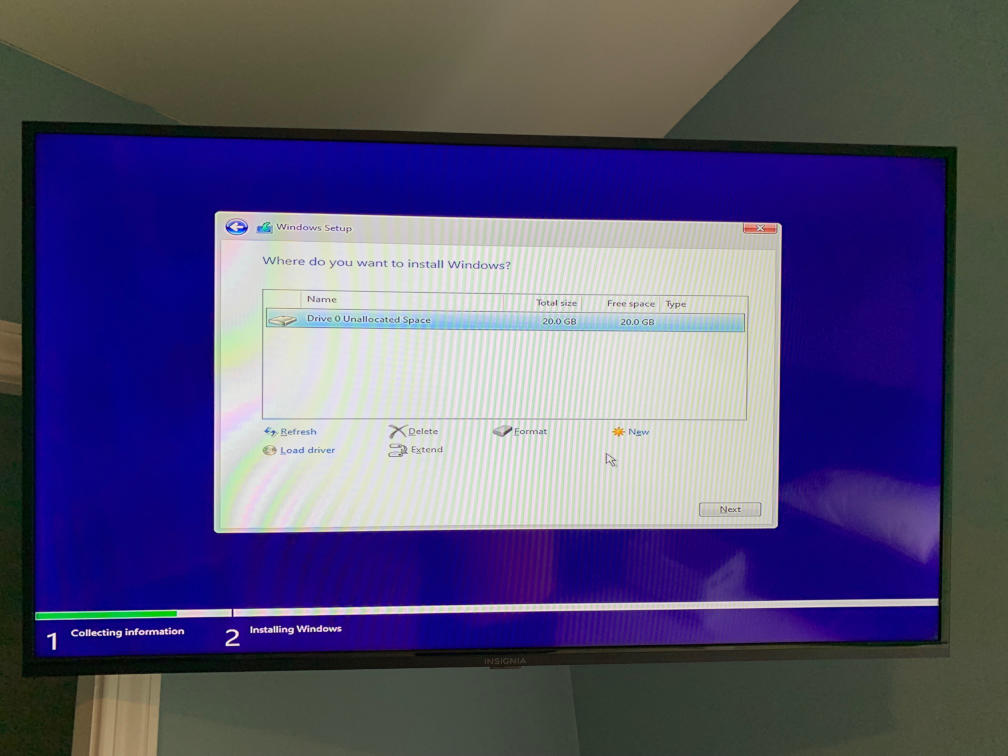
Unfortunately, this win was short lived, as I couldn’t get the installer to partition the iSCSI drive. It found it, and it was blank, but clicking ’new’ would let me go through the process of creating the partition, and then it would hang when actually creating it. Unfortunately, this is the end of my adventure, as I’m sick of dealing with Windows 10. I’ve read (relatively few) guides of this working correctly in Windows 7, but it seems to be a fairly unpopular solution in the modern era.
Conclusions⌗
Is this a good idea in a homelab in 2021? Probably not the best idea. There are far better options for VDI than network booting a Windows installation over iSCSI. Is it an option for the right scenario? Definitely. PXE has its place, and it’s definitely been a fun project to learn about it. The key lesson I’ve learned is that it should be used when you are booting a read-only something, and a whole lot of that something, to justify setting up and configuring a server. If you just want to network boot one media center PC to avoid buying an SSD, this is probably not the solution for you.
Where does network booting have a place?⌗
- For installers, where you network boot into a menu to select which installer you want to run off a network store, and install something on the computer, setting up a PXE server and all of the associated ipxe configuration is fantastic. I found a great example file for that here, although you could easily use an embedded script in ipxe to avoid writing rules in the DHCP configuration. You also have the option of identifying clients by MAC or other unique address to serve the right installer.
- For an application like a computing lab, you could use Linux and mount the root filesystem read-only using NFS, which lets you deal with common ancestry and deduplication at a file level instead of a block level as in iSCSI. You could also mount the home directory read-write using NFS separately, so every computer boots the golden root image and any changes are lost when it reboots (except the user’s home directory). Since all of the computers are physically identical, drivers and such should be the same.
- For a server cluster, it’s not a bad way to distribute the cluster OS and root filesystem either. Again, you’d setup a ‘golden’ image, mount that over iSCSI or NFS, and boot into it. The applications in the cluster must all rely entirely on network storage for this to work, which is a very reasonable expectation of a cluster, and the server would need to configure its networking based on its MAC address. Using DHCP static allocations would be easeiest for this, although if they are all nodes in a cluster they might not need reserved IPs at all and plain DHCP might be fine.
- For home use such as media centers or wall mounted tablets, it might be a decent idea to network boot into a Linux OS which again mounts a read only filesystem designed for this purpose, loading the media over the network. For this to be viable you really need a decent number of nodes, and you really need to be running Linux, which is much less of a headache to network boot. The new Raspberry Pi 4 keeps the first stage boot image in EEPROM instead of on the SD card, meaning you can reprogram it to look for other boot devices, including PXE. The older Pi’s would need an SD card to store the first stage boot image, which could then go out and network boot, leaving the SD card otherwise unused. That said, simply booting a read only filesystem from the SD card and loading the media and configuration off the network would be easier to setup and easy to replace if it breaks.
- For a home lab which uses GPU partitioning, where you lose the ability to use the physical outputs on the GPU (or use GPUs which never had them), you could network boot a Linux image on all of your computers which in turn launches Parsec as the only graphical environment, to connect remotely to the host on the compute server.
- While researching this, I found a number of companies offering software to centrally store the boot disks of Windows corporate workstations, so the company could keep classified data safe overnight without manually removing all of the hard drives from the computers. By removing the drives from the server or keeping it physically secure and disconnected overnight, they could network boot all of the workstations and reduce the chance of physical data theft. There is also some advantage in doing this that you can make a golden corporate image and clone the image for each employees workstation image (or, if you’re really paranoid, wipe them overnight back to the golden image), reducing space on the server since they are all based on a common ancestor, keep central backups of the images, and let any physical workstation boot to anyone’s personal workstation image as required, so no more cloning hard disks when replacing desktops. If your workflow is already heavily based on keeping files on the server and only programs and customizations are stored locally, this could work very well. Linus (of LTT) might be better off network booting all of his editing workstations rather than his living room gaming computer.
What’s a better option for a home lab?⌗
- For a media center or home theater that also does gaming, using VFIO (PCIe passthrough or SR-IOV) to a GPU in a compute server and connecting that via long distance HDMI / DisplayPort / USB3 active optical cables is probably cheaper and less power intense way to get 4K/60 video to the client. You’ll be able to use the compute resources you already have in the rack, and unless you’re getting small form factor desktops which can fit a GPU in bulk, probably save money by only adding the GPU to an existing compute node. If you are gaming, you probably don’t want to deal with the latency of streaming over the network, although apparently Parsec isn’t bad (I haven’t used it myself). The downside is that there is no standard for connecting any of these things over networking fiber, so your cheapest option is usually an active fiber cable instead of using standard networking fiber, which means pulling wires which are essentially already dated when installed (i.e. HDMI 2.0 = no 8K without pulling new wires). You also can’t partition the GPU if you use the physical video outputs, since GPU partitioning was never designed to be used with consumer GPUs in the first place (on either the AMD or nVidia side), and the tricks used to partition Geforce GPUs essentially make the drivers believe it’s an equivalent Quadro or Tesla with the same silicon.
- Give each user a laptop with a locally installed OS and let them connect to hosts in the compute node (which can use GPU partitioning) for workloads that need more compute or GPU performance.
- For a dedicated single user workstation, using dedicated local storage still isn’t an awful choice, it just makes backing up the OS drive more difficult than network booting. The same goes for laptops.
- For both laptops and desktops, you have the option of installing the user’s OS inside a hypervisor and using the hypervisor to manage backups. You may use XCP-NG or Proxmox, pass through the physical GPU to the guest, mount the guest from local storage, and have the hypervisor snapshot and push the backup to the server periodically. You’ll have less space available to the guest due to snapshots, but SSDs are cheap enough now. Re-installing the hypervisor on disk failure and then restoring a backup of the guest disk is probably easier than re-installing the guest OS and all of the programs on it, even if you have good data backups. For this to work, you can’t pass through the entire disk to the guest, since you need to manage snapshots through the hypervisor.
- Installing Windows programs on a network share is possible, with the right permissions in Samba. You can also locate your Steam library on a network drive. Steam games are very easy to reinstall, but tend to be massive, so keeping them backed up locally just saves internet bandwidth if you have a drive failure.
- For macOS, apps are considerably easier to backup since they are usually part of an App Bundle which can be copied freely, so backing up the entire Applications directory isn’t really difficult. There are certainly some apps which don’t respect the App Bundle, but it’s a lot easier than on Windows.
- For Linux, writing an Ansible playbook to install your normal desktop apps on top of a fresh distro install is a pretty decent solution.
I hope to explore some of these options in a future adventure.