Re-Using Old XFINITY Security Hardware in a Real Automation System
A number of years ago, my dad subscribed to Comcast / Xfinity’s security system to get a discount on internet, then un-subscribed when the promotional period ended. Their system relied on a Technicolor touchscreen which acted as a Zigbee hub, connected to a number of Zigbee door switches and a Zigbee wall moounted keypad. They wanted their touchscreen back, but didn’t care about all of the dirt cheap sensors or the keypad, so they’ve been sitting in place in the house for many years now. In this project, I revived them with new batteries and added them to my Zigbee network, trying to find a good use for them.
The Hardware⌗
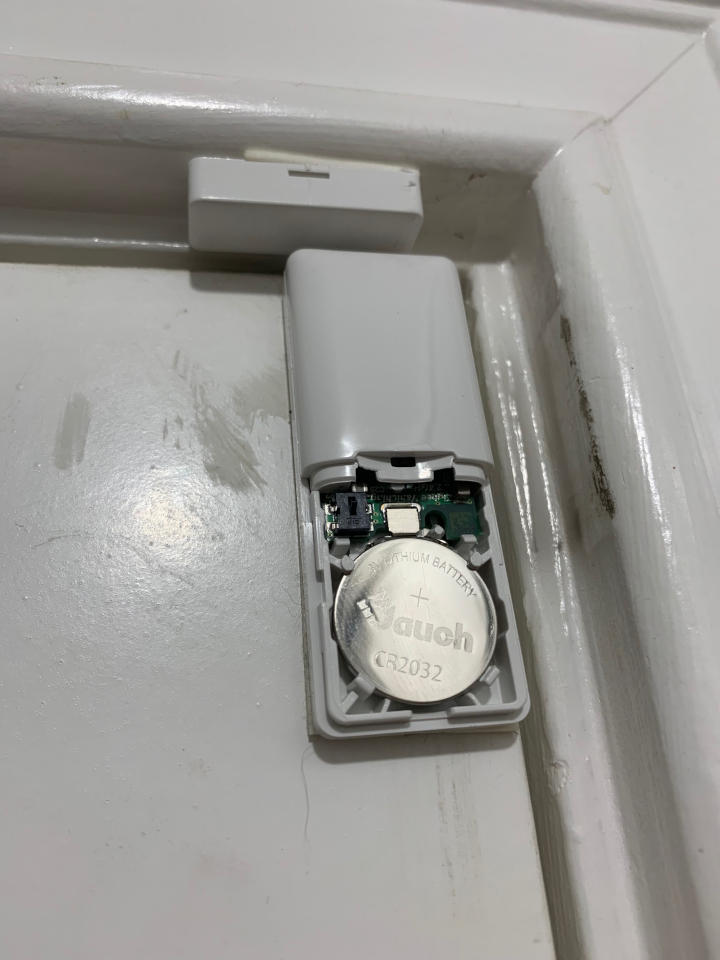
There were two pieces of hardware which I had available. The door contacts are Visonic MCT-340 SMA magnetic sensors (with temperature sensing, even), and the keypad is a Centralite 3400-D. Both of them are already supported by Zigbee2MQTT, which I use to manage my Zigbee network.
The Visonic sensors were all mounted with double sided foam tape and were kinda ugly, but they’ve been there for years so I don’t want to mess with them. One of them had been installed on top of 3 layers of foam tape to prevent the door from hitting the magnet, so I spent some time with the foam tape getting that sensor and magnet in a less ugly position without moving them too far. The sensors need CR2032 batteries, so I bought a bulk pack since it’s a fairly common size for this low cost automation stuff. In Zigbee2MQTT they report the switch status, the tamper status (if the battery cover is removed), the temperature in integer degrees celsuis, battery %, and link quality. Nothing super special here. They seem to work fine, latency isn’t bad, nothing much to write home about. They were basically free and now they are useful for only the cost of a new battery.
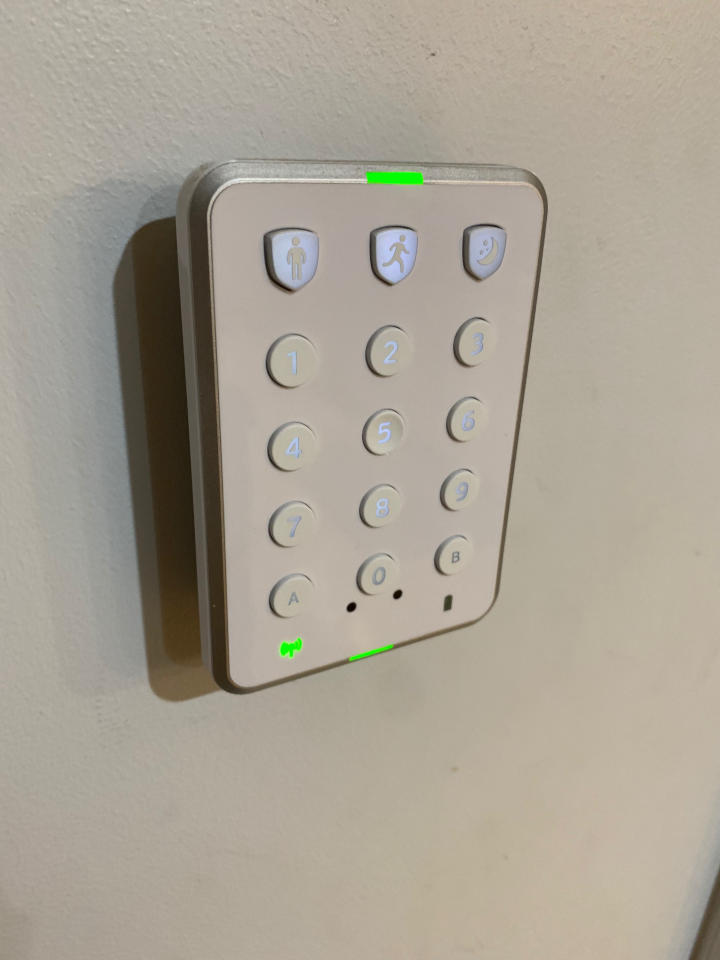
The Centralite keypad is .. special? It has a wall bracket which is screwed to the wall, but it readily clips off the bracket. It has a tamper switch to detect when it’s removed from the wall bracket, and this switch is also used for pairing, but it doesn’t seem to report the tamper status in Zigbee2MQTT. It does report an ‘occupancy’ status, but I haven’t found out why, it never triggers it, even when waking the keypad up by waving my hand over it. It uses two CR123A batteries, which is also fairly common with low cost automation stuff, so again I bought a bulk pack.
Keypad Codes⌗
The keypad reports a topic named ‘Action’ whenever it detects a valid keycode. It does not validate the keycode itself, rather it passes the keys typed to the Zigbee controller which is supposed to process the keycode and return if the key was valid or not. It only accepts 4 digit keycodes, and transmits the entire code as soon as the 4th digit is pressed. I was hoping to be able to enter shorter key combinations to control automations, sorta like a many-button remote, but it absolutely must be 4 digits for the keypad to send it. If you only type 4 digits, it will send a ‘disarm’ command with the keycode. If you first press one of the 3 buttons on the top, it will instead send one of the arm variants (arm all, arm day, arm night). So, you get an event from the keypad with 4 numbers and one of 4 modes associated with it, and you need to respond for the keypad to beep a happy beep or not respond for the keypad to beep a sad beep. In addition, if the code is incorrect (or it doesn’t get a Zigbee response confirming it), it will wait a few seconds before letting you try again.
Because of the complex logic required to check if the keypad code is valid and carry through the transaction ID of the keypad when responding, I decided to implement the log in Node-Red, using the built-in Home Assistant add-on and integration. I wrote a Node-Red flow which demonstrates how to deal with the keypad, have a list of codes to check, and how to change or enable some of these codes from Home Assistant (using input_boolean and input_number, although you could also use a binary_sensor). This only deals with the keypad, you still need to use the associated alarm control panel logic in Home Assistant or your alarm panel integration to make a fully working alarm system. The Node-Red flow for this is available below.
Of course, there’s no reason you need to limit yourself to only treating this keypad as an alarm keypad as I have. It would certainly be possible to set each ‘disarm code’ to turn on or off a different entity, if you wish to use this as something more of a bedside automatino keypad. It’s not great for that, but with a little node-red magic it will definitely function. A Node-Red flow for this is also available.
The Project Files and Parts List⌗
Here are all of the files and parts required to replicate this project.
- Visonic MCT-340 SMA as provided by XFINITY - You can do better with another Zigbee vendor, but they were free to me.
- Centralite 3400-D keypad as provided by XFINITY - You can probably do better here, although I don’t have a product suggestion to give
- Working Zigbee2MQTT install
- Node-Red Flow to use Keypad as Alarm Keypad
- Node-Red Flow to use Keypad as Automation Keypad