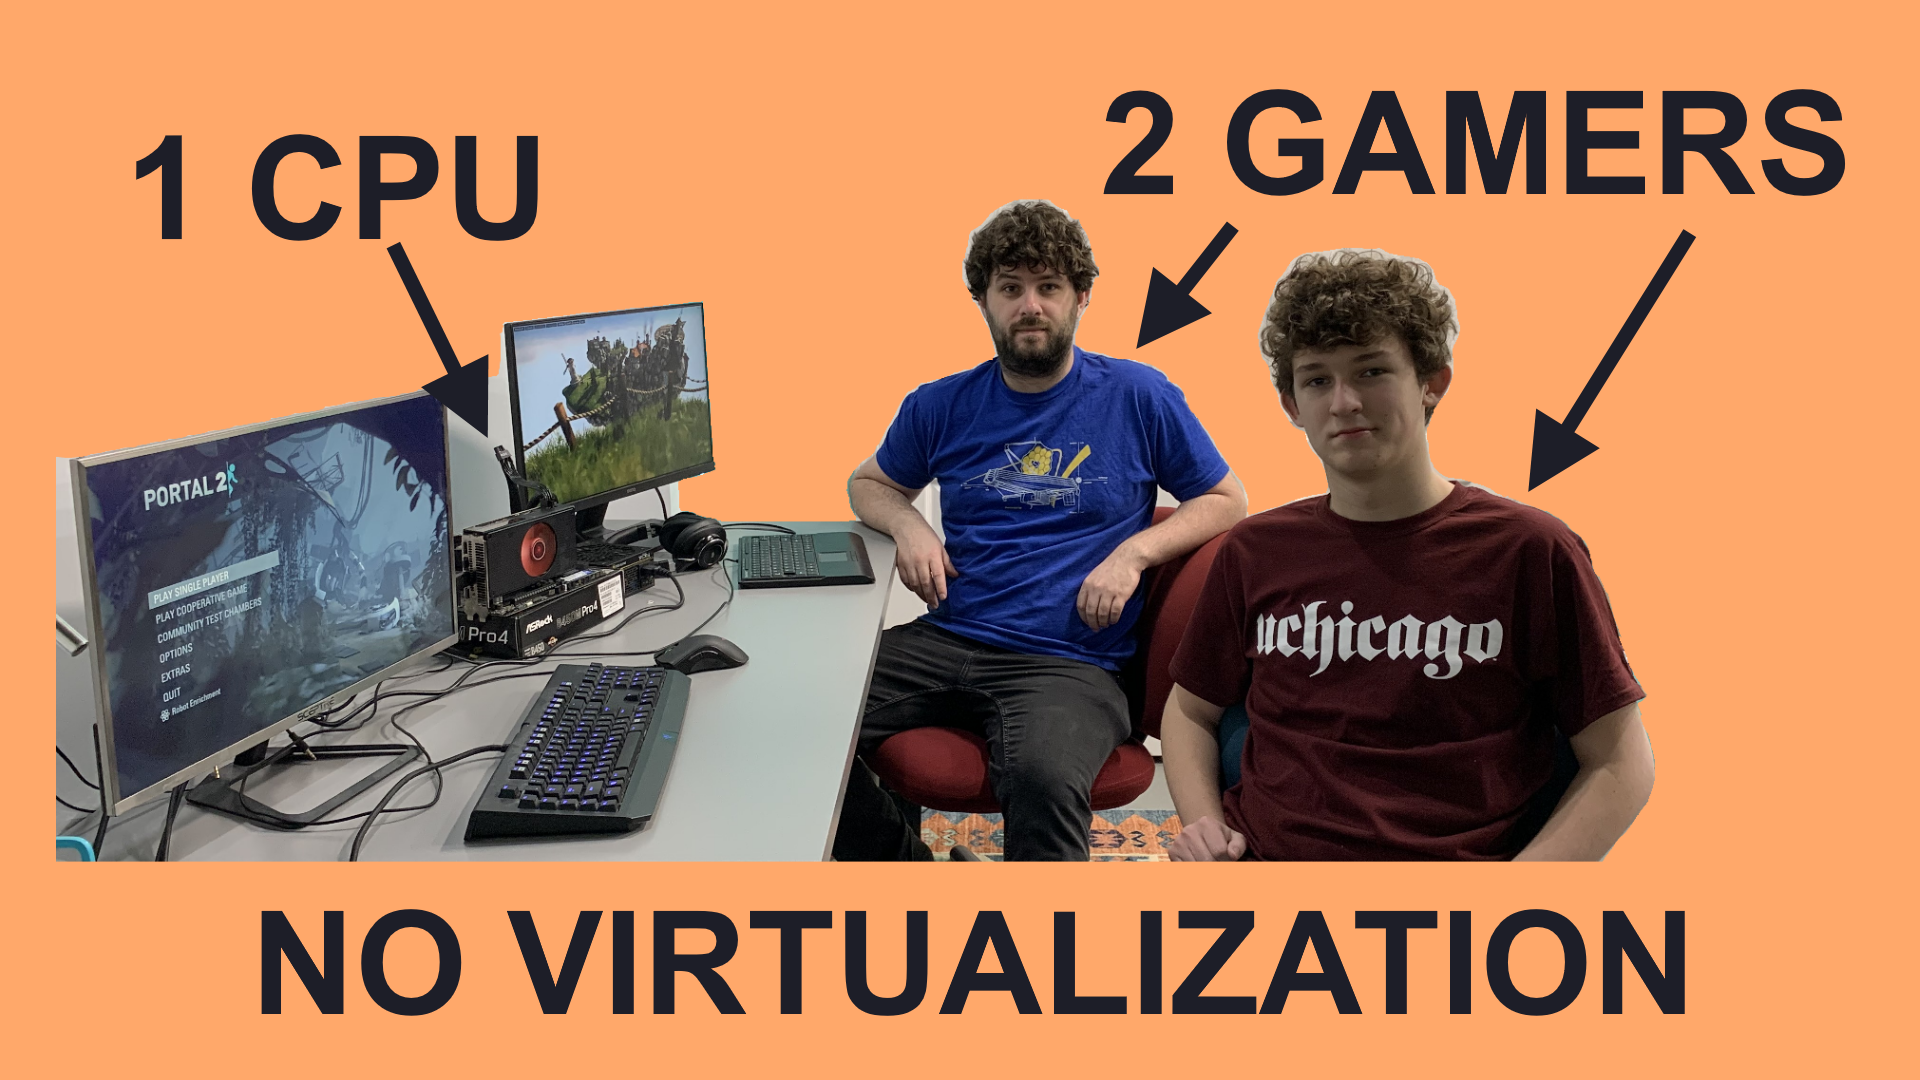
2 gamers, 1 cpu, NO Virtualization!
I’ve been using Linux for a long time. The first distribution I ever installed was Ubuntu 6.06 ‘Dapper Drake’, on which I ran a phpBB server for my school friends. Security was poor. But shortly after, as I learned about Linux desktops (and first daily-drove a Linux laptop around 2012), I learned about ‘Multiseat’. The Wikipedia article has a cool picture of a very 90s looking desktop tower with 4x CRT monitors, and that image was published to Wikipedia in 2005, and I saw it in middle/high school years. This multi-seat configuration stuck with me, and for years I’ve wanted to set it up myself. Finally, in 2022, I’m ready to set this up, and I’m going all in - ONE computer, TWO users, and support for both OpenGL and Vulkan gaming!
This project is part of the Multiuser, Multidesktop, and Multiseat Megaproject.
What Is Multiseat?⌗
Multiseat is a system that allows Linux systems to operate with multiple users at the same time. Linux has been inherently a multi-user system essentially for its entire life, but normally there is one graphical session plus more than one terminal session (i.e. by SSH). It’s also possible to create multiple graphical sessions using a remote access protocol like I did in my XRDP Video. But, with multiseat, we take this to the extreme - we hook up multiple monitiors, keyboards, mide, peripherals to one system and partition them up so each user can use their own hardware, sharing the computational resources of one computer amongst all of the users who are physically seated within cable length of the computer.
Currently, to get full GPU acceleration (OpenGL + Vulkan), we need to dedicate one GPU to each user. This is due to security concerns in the kernel devs about the potential for poor information security between multiple users, as graphical applications are given direct access to GPU VRAM to improve performance. If you don’t care about hardware acceleration, stay tuned for a future video where I omit the gaming and 3D requirement and build a many-user productivity box for poor cube farm workers to use basic desktop things.
Contents⌗
This is a super long blog, so feel free to jump down to any specific segments
Video⌗
Click the thumbnail for to view the video on Youtube
Hardware and BIOS Configuration⌗
The hardware I’m using for this test is:
- AMD Ryzen 5 3400G APU - Zen+ architecture, Raven Ridge + Vega graphics (shows up as ‘Raven2’ in
radeontop) - AMD Radeon RX580 GPU - Polaris architecture (shows up as ‘Polaris10’ in
radeontop) - ASRock B450M Pro4 AM4 motherboard (it was low cost when I bought it)
- 32G DDR4 (2x16G sticks)
I specifically chose this test hardware for this project since both the APU and GPU use the same driver - the open source amdgpu driver. In theory it should be possible to mix AMD and Intel graphics (since both use Mesa), but as far as I can tell it is NOT possible to mix Nvidia and other GPUs using the proprietary drivers.
I played a bit in the BIOS to make sure that both GPUs show up correctly. I found that I need to set the primary GPU in the BIOS to the internal GPU, otherwise it disables the Vega GPU entirely. This could be a quirk of the BIOS on this board. I cannot update past the current BIOS version as later versions dropped support for Summit, Raven, and Pinnacle Ridge CPUs (og Zen and Zen+). Knowing which GPU is ‘primary’ (which should be the one that GRUB and the BIOS show up on) is going to be very important later.
Software Setup⌗
I chose to install Ubuntu 22.04 ‘Jammy Jellyfish’, which is currently in beta as of the writing and filming of this video but should be released completely by the time this blog and video drop. I know that Linux distros are extremely controversial topic, but Ubuntu has excellent hardware support, 22.04 uses the Linux 5.15 kernel which is more recent than Debian ships, and the environment should be fairly well tested as it’s the basis of other very popular desktops such as Pop!OS. I’m intentionally using AMD GPUs to avoid fighting with the Nvidia proprietary drivers, and I’ve found the open source amdgpu driver to be quite excellent.
During the install, I selected ZFS on root (although you can choose whatever you want of coruse), and to install third-party codecs.
After installing, I did some basic housekeeping (sudo apt update && sudo apt upgrade -y), and installed OpenSSH server so I can access the system if I royally mess up later. In case you need to hit the display manager over the head later, you can run sudo systemctl restart display-manager and it should restart gdm3, logging out everyone and starting back from the login screens.
Switch from Wayland to X11⌗
I found that, while it’s possible to configure multiseat on Wayland, Vulkan did not work properly with multiple GPUs. I chose to revert back to X11 to deal with this. It’s a fairly simple configuration change. For Ubuntu 22.04 with GNOME, edit /etc/gdm3/custom.conf and find the line #WaylandEnable=false and uncomment it. Once you reboot, it should be using X11 entirely.
Initial Benchmarking⌗
Before I split into multiple seats, I’m going to run with just the iGPU, followed with just the dGPU, and benchmark the system. I’m using Unigine Heaven Benchmark for OpenGL, and Portal 2 for Vulkan. Both are fairly dated titles at this point, but I’m honestly not a huge gamer and this game has good Vulkan support on Linux. I just want to make sure performance later is within the same range as it was before I added two seats. I do this by enabling just the iGPU, then just the dGPU, then switching back to both of them. You don’t need to do this, it’s just nice to confirm that we aren’t really losing GPU performance at all.
Configure Seats⌗
Here, we do all of the hard work with configuring the seats with loginctl. Systemd supports the concept of multi-seat natively, and the most popular desktop environments should properly listen to the seat tags and assign devices correctly.
First, we can list which seats currently exist:
sudo loginctl list-seats
It should tell you seat0 and nothing else. We are going to name our new seat seat1.
If you’re curious about the hardware currently on your system, use seat-status:
sudo loginctl seat-status seat0
I’ve found it’s handy to save this to a file for later reference:
sudo loginctl seat-status seat0 > seat_hardware.txt
By default, all hardware is attached to seat0. By using loginctl, we can create rules that force specific hardware to be assigned to a different seat. Hardware can be dynamically reallocated using loginctl, and it will unassign hardware from one seat and move it to the other. A seat must have a “Master of Seat” (shown in seat-status as [MASTER]), which is a graphics card. Once a master of seat exists, a login prompt will be spawned for it, and once you add a keyboard/mouse, you can login using it.
In order to attach hardware to a seat, we need the entire sys path (as shown in seat-status) and to call attach:
sudo loginctl attach seat1 /sys/<path to device>
Once we’ve saved the current seat status as a text file, we can comb through it and decide what we want to attach to the second seat. Then, we can copy paths out of the file so we don’t have to type them.
Graphics, Sound⌗
In my case, I have 2 graphics and 3 sound devices. Each GPU has sound, plus the on-board chipset audio. I’m using the HDMI audio output for both seats, so each graphics and its associated sound device is passed through. I left the chipset audio assigned to the initial seat, so only that one will have analog microphone. If you want the second seat to have a microphone input, you’ll need a USB audio device for it.
Figure out the PCIe addressees of both of your graphics cards using lspci. Look for VGA Compatible devices, and their associated sound devices.
In my case, the Raven GPU is 07:00.0 and the Polaris GPU is 01:00.00 (with the sound device at *:00.01 for both)
USB Ports⌗
For USB ports, you need to forward them by USB bus, which is a combination of the PCIe root device and the port off the root complex. For most systems the USB root complex is part of the CPU itself or the chipset, possibly with USB hubs on the motherboard to split USB3 root ports into multiple USB2 ports. You will need to go through using lsusb with a known USB device to see which ports on your motherboard are associated with which USB bus, and move devices around until the devices for multiple seats aren’t sharing the same bus. I recommend getting a USB3 hub for each seat to make it simpler to deal with this, since you can find the USB bus of a specific USB3 port and easily pass through all devices downstream.
Once you’ve done that, go back to your seat hardware file and find the entry for the USB bus you want, then loginctl attach it to the new seat. Changes should take effect immediately.
Removing Multiseat⌗
If you want to completely revert, run sudo loginctl flush-devices to flush the seat config, which should take you back to the seat0 configuration you started with at the beginning.
The settings should be retained through reboots, so you shouldn’t need to call loginctl again after everything is setup unless you want to modify hardware assignments.