Simple Polycarbonate Enclosure for Prusa Printers
In 2018 I bought a Prusa i3 MK3s kit, and I’ve been very happy with it. However, I’ve found that it really struggles with early layer curling, even with PLA, in my cold basement. The solution to this problem is to build a box around the printer. The box will retain more of the heat generated by the printer, hopefully resulting in less warping due to cooling of the printed parts. This box should work with any other printer too, as long as you get a sheet of polycarbonate large enough for your printer.
The First Box⌗
To test if the temperature / airflow was causing my print issues, I built a box out of foam floor tiles. The box worked remarkably well, instantly reducing curling of print edges and prints coming off the bed. It wasn’t exactly pretty though.

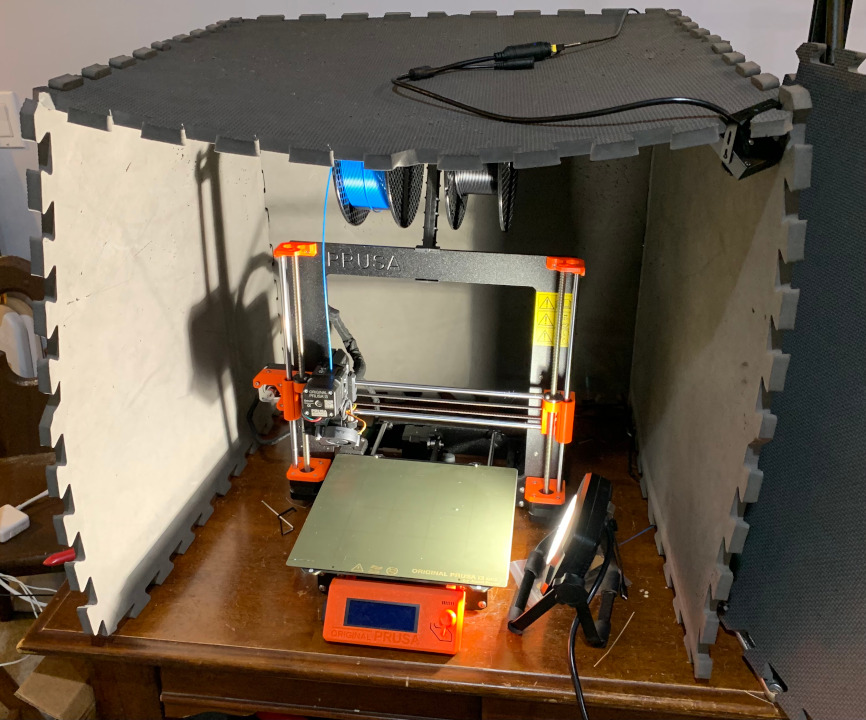
Obviously, this wasn’t a great long term solution. It does have a decent mount for the 3D Printer Camera though.
The Second Box⌗
The second box is designed to use 2’x2’ sheets of polycarbonate. I already had a box of 2x2 sheets of 0.060" polycarbonate leftover from other projects, so that’s the thickness I used. Had I purchased material for this project, I would have gone with a thicker sheet for increased stiffness.
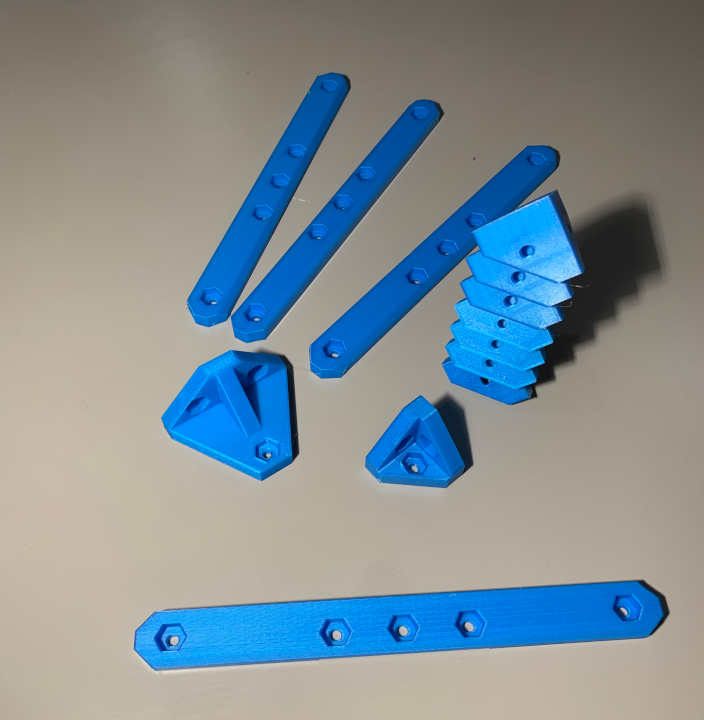
I decided to design and print corner brackets first. These are triangular with 3 sides, each with space for a #8-32 UNF fastener, and a nut pocket that’s a little oversized to avoid the need for a wrench. Since a cube has 8 corners, I need 8 brackets, and made them all with the same design instead of modeling specific variants for bottom or front corners.
After the corner brackets, I designed a similar shaped bracket to hold the camera. I used a #8-32 UNF fastener to mount the camera.
The final model for the initial design is the hinge stiffener bracket. It has 3 holes to mount the hinge. I used VEX Robotics Hinges since I had easy access to them, and they use a 1/2" hole spacing, so the model picks up 3 of the 5 holes, plus spreads the load across a wider area to reduce local bending of the polycarbonate. The width was chosen based on the print bed limits of my Prusa i3 MK3s printer.
While the printer started working, I ordered my fasteners from McMaster-Carr and waited impatiently for them to arrive.
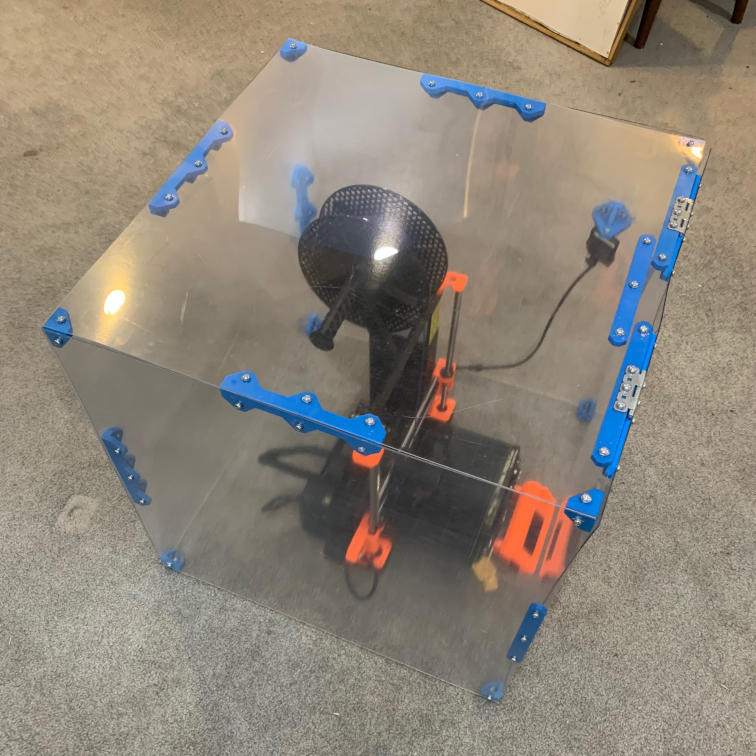
Assembling The Box⌗
Newly printed parts and fasteners in hand, I started to assemble the box. I quickly found that there were a few issues with the design that I would need to address:
- The nut pockets in the parts were all designed 1mm oversized (flat to flat), which was a bit on the large side, but when I tested the first printed part, I found that certain edges of the hexagon would sag as they were printed unsupported overhangs, and the nuts I had on hand had no problem tightening with that large of an oversize. However, the nuts I had on hand were not nylon locknuts, and didn’t require as much torque to tighten. With the nylon locknuts, one of the three hexagons (the one printed flat without any overhang sag) would spin in the pocket when tightened. The other two were usually fine. I chose to jam a screwdriver into the nut pocket to hold the nut instead of re-printing the parts, but I did go back and fix the original models and export new AMF files for you guys, so the downloads are all corrected with an 0.5" oversize, which I used for the later stiffener parts.
- The plastic is way too thin to support the box with only corner brackets. I designed and printed a new side stiffener bracket to mount in the center of each edge, where two side panels meet, to hopefully improve the rigidity of the cube.
- The front corners of the box spread easily. This may or may not be a problem, I’m going to see what happens once the stiffeners are installed. I can’t print a single piece to span the gap, but I should be able to fit 3x pieces in the printer and assemble them. Alternatively, I could use rubber feet to try and keep the box in place.
- The center sags between the two hinges, and the left and right panels also sag in the front. I need to find a way to stiffen the center aruound the hinges at the top of the box, and interlock the door better to keep the whole box solid. Maybe magnets are the solution here. They are handy sometimes.
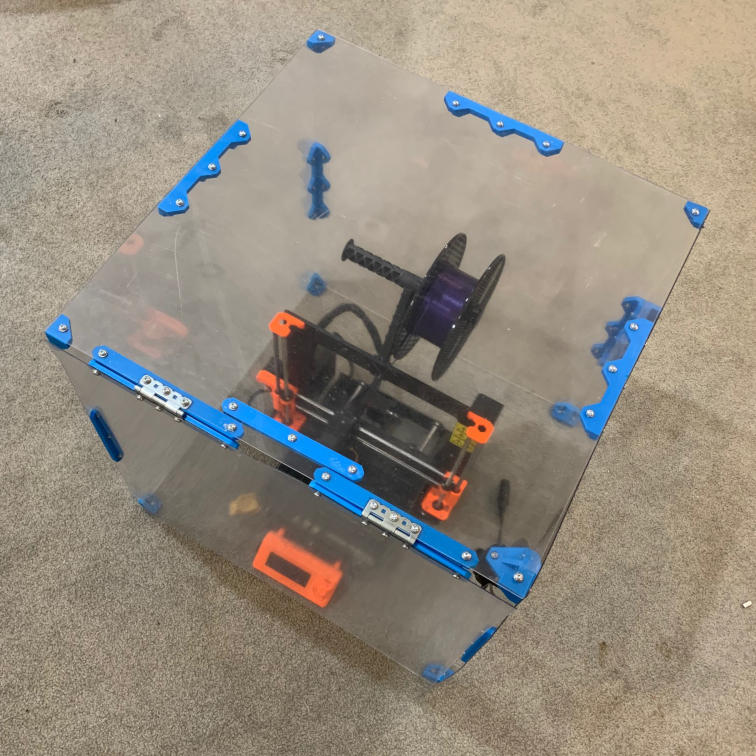
Completed Box⌗
After printing more edge stiffeners and linear stiffeners, I assembled the box for the last time, and added the door. I also made 10mm feet for each corner, to lift the box up a little bit to leave room for cables. Due to the hinge design, the door ends about 10-20mm below the bottom of the box, but I didn’t trim it, intead I use this to ‘prop up’ the box since the polycarbonate is so thin. If you copy this, definitely use a thicker plastic, I just used what I had.
The Project Files and Parts List⌗
Here are all of the files and parts required to replicate this project. All design files are licensed Creative Commons CC-BY-SA.
- VEX Robotics Hinges
- 1/16" thick 2’x2’ Polycarbonate Shets - You should buy 1/8" or thicker
- #8-32 UNF x 1/2" stainless steel bolt - Increase the length of the bolt if you go above 1/8" thickness
- #8-32 UNF stainless steel nylon lock nut
- #8 stainless steel washer
- 3D Models (AMF format)
- 3D Model originals (FreeCAD format)
- Thingiverse Page
- PrusaPrinters Page