3D Printer Nozzle Camera
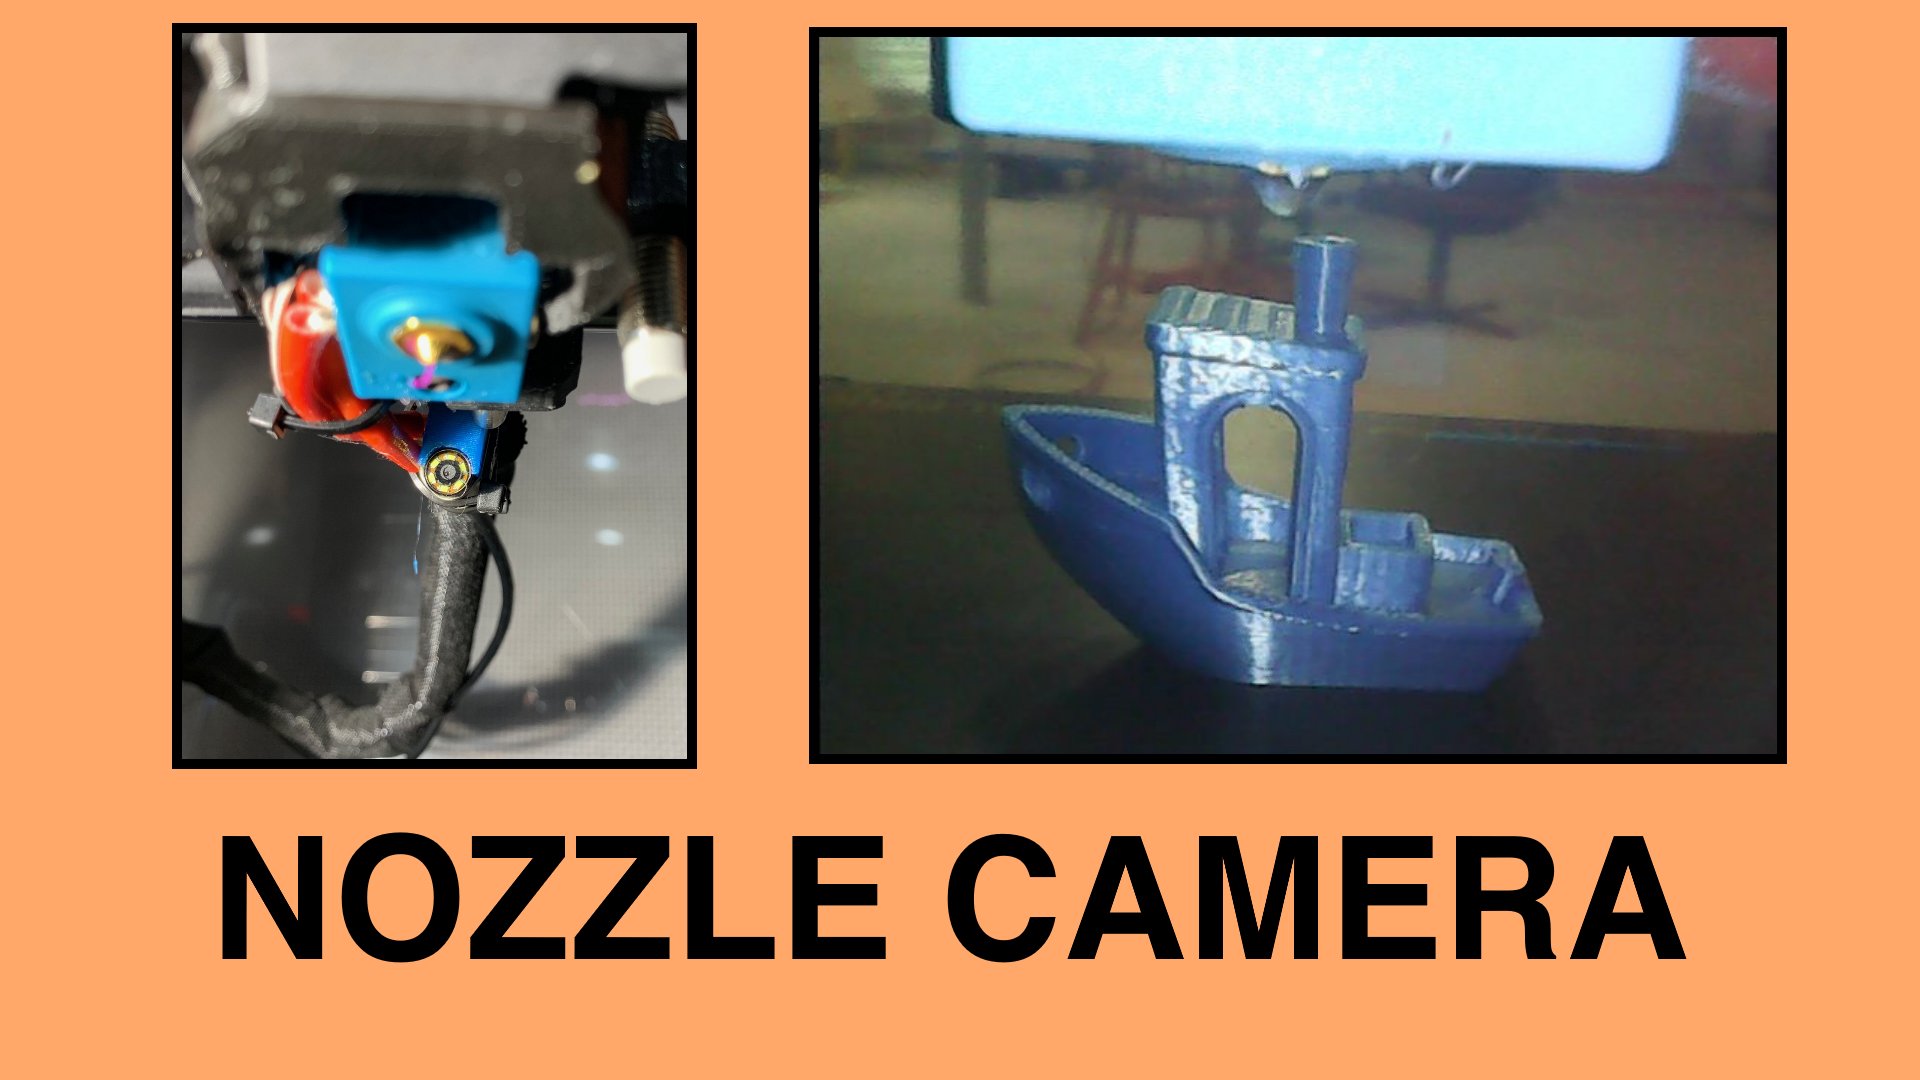
After buying some cheap USB boroscope cameras to use as an actual boroscope for home renovation projects, I decided to buy one with a flexible cable to mount near the nozzle of my Prusa i3 MK3s to get a time-lapse of the nozzle during the printing process. Watching the first layer closely during a print can show failures early, since most failures are due to bed adhesion or other first-layer problems. Keeping the camera out of the print volume while still getting a good view of the nozzle and print was challenging, but I ended up with a cool solution that I’m really proud of, and the view is fantastic.
Camera Mounting⌗
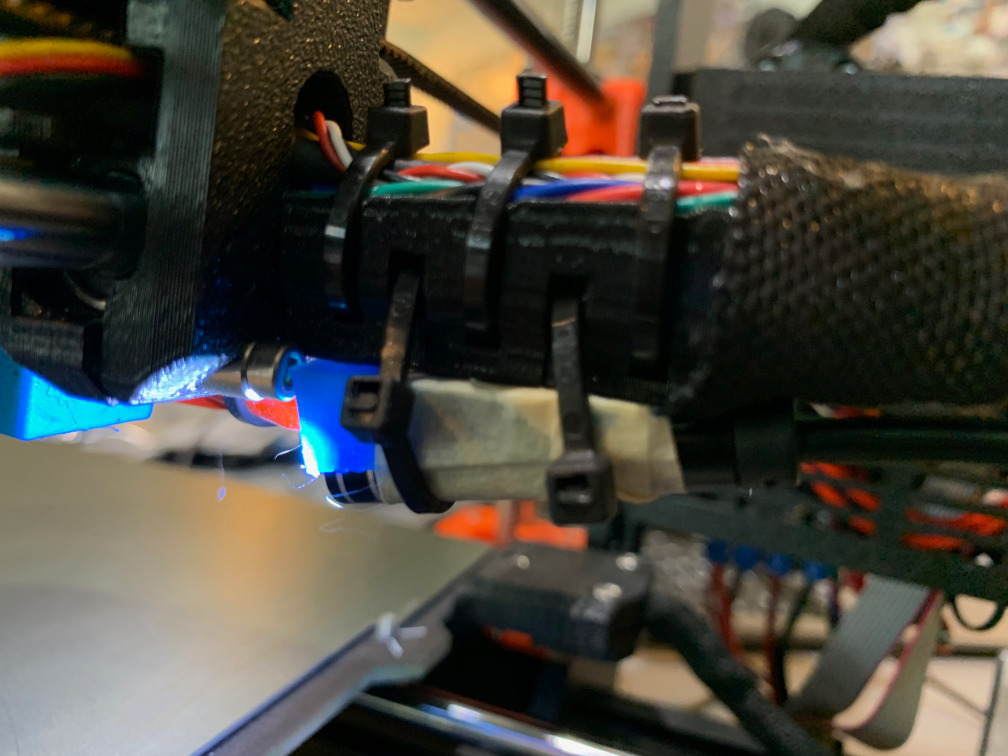
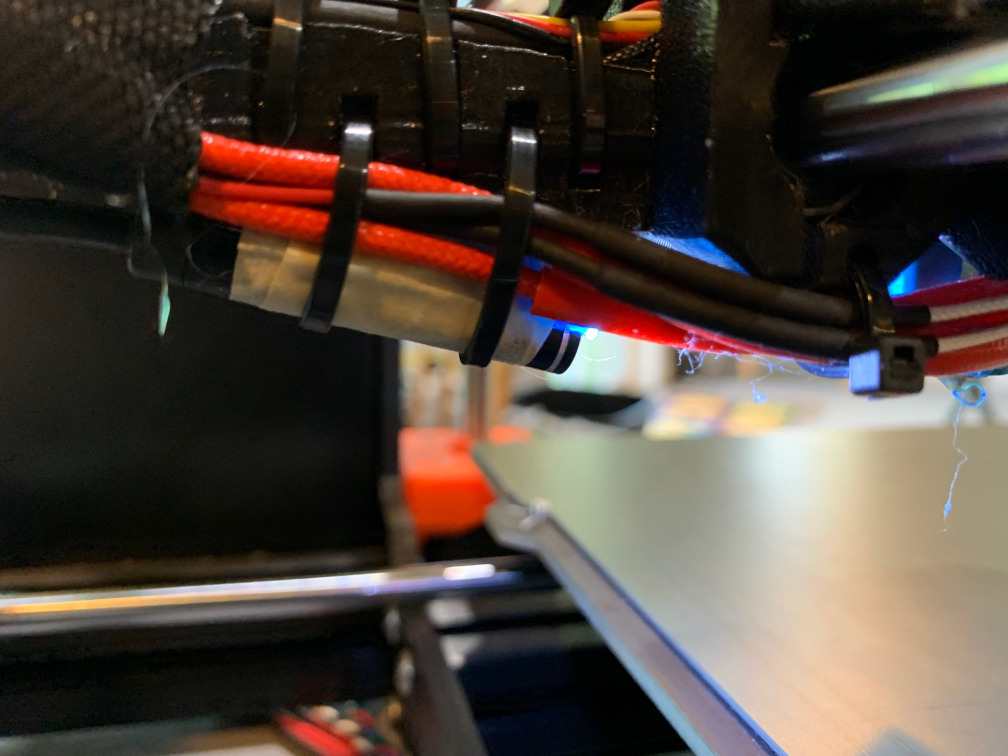
I started by holding the camera up to the printer and measuring where I wanted to mount it. The Prusa i3 MK3S has a bracket which goes off the back of the extruder assembly which anchors the flexible cables to the extruder. The cables from the extruder motor, PINDA probe, filament sensor, and fans run over the top of the anchor, and the cables from the hotend heater and thermistor run over the bottom of the anchor. I decided to make a wedge to sit against the bottom of the anchor, allowing me to use the well designed zip tie holes to securely mount the camera. The hotend wires can move along the side of the anchor, leaving space for the camera. I held up the camera in place with the camera view open on my laptop and decided the slope I want (1/4" over the length of the camera), then measured the dimensions of the camera with calipers to make a mount with a half circle for the camera to sit in.
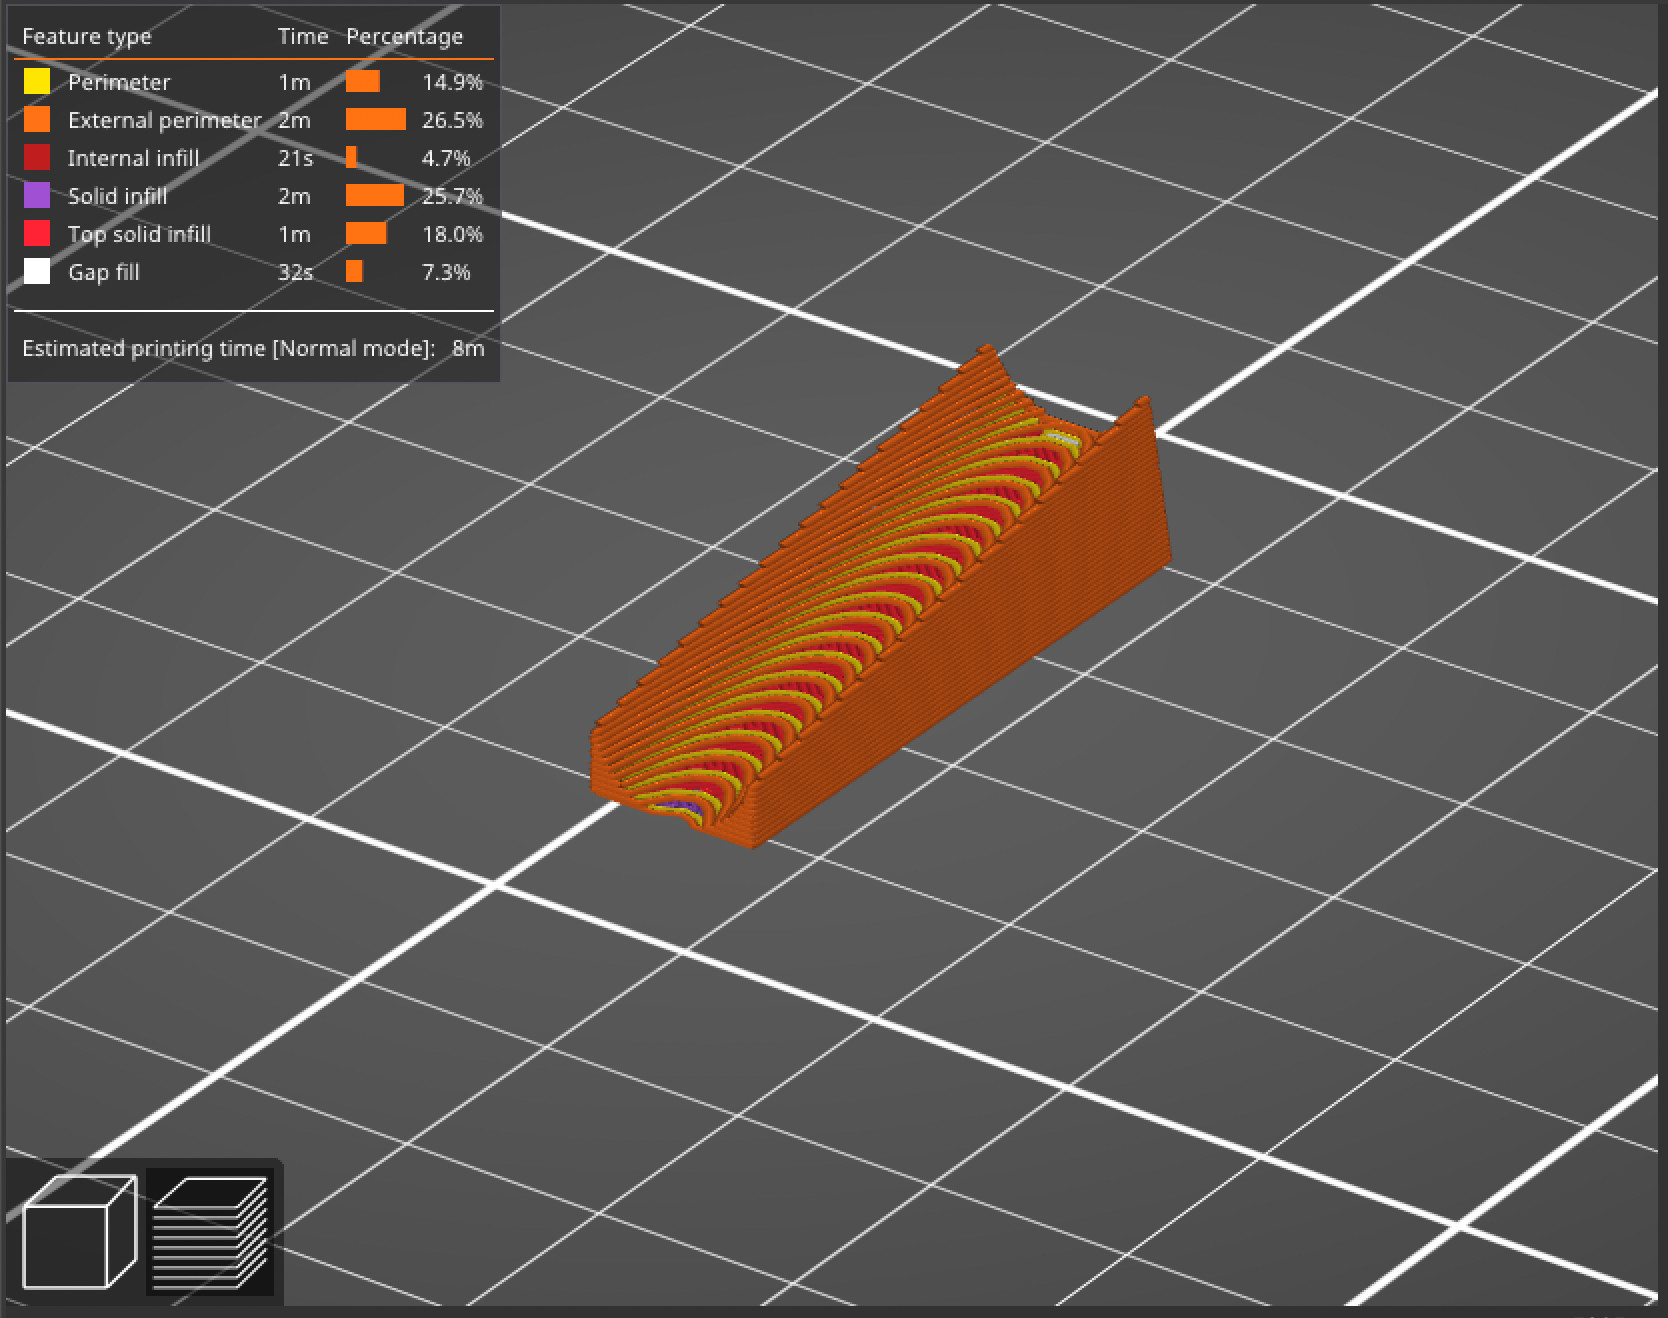
After running the tiny part on the printer, I decided to tape the camera to the bracket, since the camera has a smooth metal finish and zip ties would not securely hold it against rotation. To align the camera, I set the bracket on the table (upside-down), placed a square object in front of it, and rotated the camera around by its cable until the square object was aligned to the image upside-down (since the bracket will be flipped when mounted on the printer). I then wrapped the camera and bracket in masking tape, careful to maintain alignment.

Using OctoLapse to record two cameras⌗
Since I now have two cameras, I’d like to use Octolapse to record both of them. I installed OctoLapse through the OctoPrint plugin manager. I’m starting from the config I’ve been building up in the OctoPi Project and 3D Printer Power Project.
Once it was installed, I setup two new cameras for the Ethernet camera and the built-in OctoPi camera, which is now the nozzle camera. I renamed the default camera to NozzleCam, and created an entirely new camera for the Ethernet Cam. I didn’t bother setting the stream address, it’s only used in the web UI and I usually use Home Assistant to watch the camera anyways.
OctoLapse doesn’t use the default timelapse temp folder to store its temporary files, which leads to temporary files being stored on the SD card of the Pi. This is not ideal, so we need to add another autofs mount for the folder /home/pi/.octoprint/data/octolapse so it can keep its stuff on the network. The temp data doesn’t really need to be on the network, but the NAS can handle write wear much better than the SD card of the Pi. OctoLapse was very angry mounting the entire octolapse folder on the network, since it seems to try to chmod files after creating them (even though this is unnecessary, it doesn’t have permissions to chmod a folder it doesn’t own), so I ended up mounting the /mnt/printer (the existing printer mount) with noperm (so Octolapse can chmod files it doesn’t own and the permissions will be ignored) and created a symbolic link from the octolapse temp folder to a folder in /mnt/printer. I also forwarded the timelapse folder with a similar method. Overall, Octoprint is not happy with the autofs mounts, and keeps trying to revert to default folder paths, so maybe it’s a better approach to symlink them anyway instead of using the settings file to change them to the paths I want.
ln -s /mnt/printer/octolapse/tmp ~/.octoprint/data/octolapse/tmp
ln -s /mnt/printer/timelapse ~/.octoprint/timelapse
Other Quirks⌗
The camera has built-in lighting, and there’s a small box midline in the cable with a knob to adjust the LED intensity. However, there’s no way to turn it off, or control it from the Pi. My solution to this is to disable USB power when the printer is turned off, which opens a whole can of worms. I wrote a short blog post about my solution here.
Essentially, uhubctl works great to turn on/off the power to the LEDs, but it also turns off power to the camera itself, so the webcamd streamer needs to be restarted when the camera returns. It also cuts power to the printer, which isn’t powered over USB, but powers its USB isolation from the USB side, so the printer serial port drops out as well. When I re-enable power, it takes a few seconds for the USB UART for the printer to return as well, so I extended the connection delay (from when the power is turned on the printer and USB to when the printer connection is attempted) to 15 seconds, and this seems to work adequately.
Result⌗
Click on the thumbnail to view the full video on Youtube
The Project Files and Parts List⌗
Here are all of the files and parts required to replicate this project. All of my design files are licensed Creative Commons CC-BY-SA. As this project uses files created by other authors as examples, please read their licenses as well.
- Camera I Used
- Wedge Mount Design Files (AMF Format)
- Wedge Mount Design Files (FreeCAD Originals)
- 3DBenchy Test Print
- Flexy Rex Test Print
- Low Poly Fox Test Print Some links to products may be affiliate links, which may earn a commission for me.